
How to Customize the Django Admin Area in Python
The Django framework comes with an integrated administration interface to carry out various administrative tasks. Its purpose is to provide developers with a convenient interface to perform CRUD operations on user models and other administrative functionalities like authentication, user permissions, etc. This interface is designed to be used as an internal management tool and not as a frontend tool. The Django project describes the admin interface as below,
“One of the most powerful parts of Django is the automatic admin interface. It reads metadata from your models to provide a quick, model-centric interface where trusted users can manage content on your site.”
One of the best features of this admin interface is the ability to customize the interface according to the developer’s needs. In this article, we will discuss how to customize Django’s admin interface.
Table of Contents
You can skip to a specific section of this Django admin area tutorial using the table of contents below:
Enabling the Django Admin
First and foremost, you need to enable the Django Admin interface. Then, you need to create a Django project called “VehicleSales” and an app called “salesinfo” with a superuser “admin” to access the Admin interface. There, you will not perform any migrations (makemigrations) as it is the database creation and there are no any user-created objects to be migrated. All the examples presented in this article will be based on a Powershell Terminal in a Windows Environment. However, all the commands are cross-compatible and can be run in any environment.
django-admin startproject VehicleSales
cd .\VehicleSales\
python manage.py startapp salesinfo
python manage.py migrate
python manage.py createsuperuser
Creating the project and the app

Creating the user
It is important to note that access to the Django admin interface is limited to users with superuser or staff attributes.

The next step is to update the settings file of the project to include the “salesinfo” app. For that, simply add the app name in the INSTALLED_APPS section of the settings file.
VehicleSales/settings.py
INSTALLED_APPS = [
    'django.contrib.admin',
    'django.contrib.auth',
    'django.contrib.contenttypes',
    'django.contrib.sessions',
    'django.contrib.messages',
    'django.contrib.staticfiles',
    'salesinfo',
]
After that, you have to populate the models to define the database structure. You will be creating three classes: Owner, VehicleSales and VehicleType..
salesinfo/models.py
from django.db import models
from django.core.validators import DecimalValidator

class Owner(models.Model):
    owner_id = models.CharField(primary_key=True, max_length=30)
    first_name = models.CharField(max_length=50, null=False)
    last_name = models.CharField(max_length=50, null=False)
    invoice = models.ManyToManyField("VehicleSale", blank=True)

    class Meta:
        verbose_name_plural = "Owners"
        db_table = "Owner"

    def __str__(self):
            return f"{self.first_name} {self.last_name}"

class VehicleSale(models.Model):
    invoice_id = models.CharField(primary_key=True, max_length=30)
    date = models.DateField()
    vehicletype = models.ForeignKey('VehicleType', verbose_name='VehicleTypes', on_delete=models.PROTECT)

    class Meta:
        verbose_name_plural = "VehicleSales"
        db_table = "VehicleSales"
        ordering = ("invoice_id",)

    def __str__(self):
            return f"Invoice - {self.invoice_id} - {self.date}"

class VehicleType(models.Model):
    make = models.CharField(max_length=60)
    model = models.CharField(max_length=150)
    year = models.IntegerField()
    color = models.CharField(default='Unknown', max_length=50)
    price = models.DecimalField(null=False , decimal_places=2, max_digits=10, validators=[DecimalValidator(10, 2)])
    description = models.TextField(null=True)

    class Meta:
        verbose_name_plural = "VehicleTypes"
        db_table = "VehicleType"

    def __str__(self):
            return f"{self.make} {self.model}"
You have defined the db_table name option in the Meta class to indicate the names of the tables that will be created in the database. Then you should add the above models to the Django Admin interface by importing them as shown below.
salesinfo/admin.py
from django.contrib import admin
from salesinfo.models import Owner, VehicleSale, VehicleType

@admin.register(Owner)
class OwnerAdmin(admin.ModelAdmin):
    pass

@admin.register(VehicleSale)
class VehicleSales(admin.ModelAdmin):
    pass

@admin.register(VehicleType)
class VehicleType(admin.ModelAdmin):
    pass
In the above example, the ModelAdmin class is used to represent the model in the admin interface while the register decorator is used to register the ModelAdmin classes for each model. You can also use the admin.site.register(
The last step of configuring the admin interface is to migrate the changes and start up the server.
python manage.py makemigrations
python manage.py migrate
Make Migrations

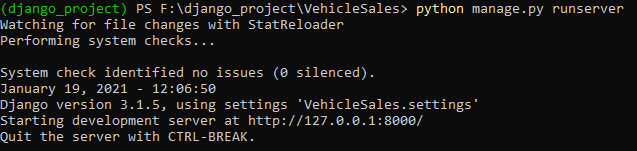
Once the migrations are done, start the Django server and access the Admin interface by visiting http://127.0.0.1/8000/admin in your browser.
python manage.py runserverStart the Server
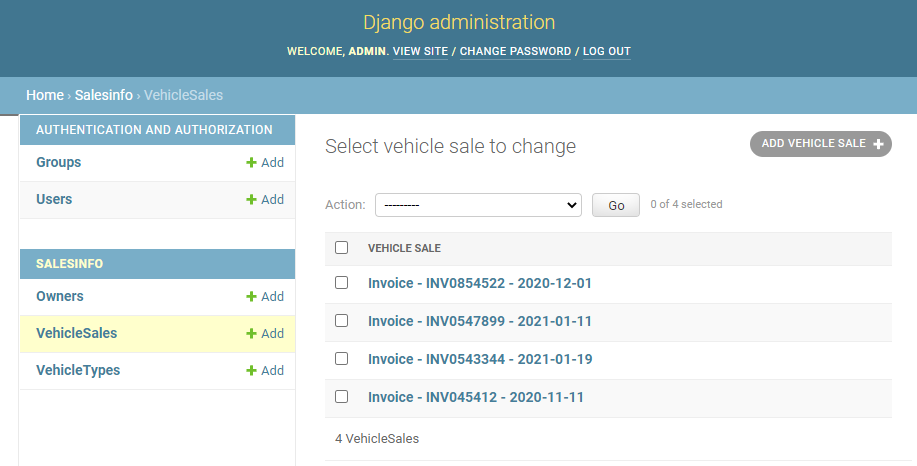
Django Admin Interface

Now you have configured a basic Django Admin interface with all the user models bound to it. Before moving into customizations of Admin interface, let’s add some data to the models. First, you can add data to the simplest model which is the VehicleTypes. For that, Click on the VehicleTypes, then click on “ADD VEHICLE TYPE” and fill the information in the correct fields. Repeat the same process for other models as well.

VehicleTypes
The (__str__(self)) method will be used to display the name of each object.

VehicleSales
Owners

Now, you have a complete set of data that can be used to learn about how to customize the Django Admin interface in the next section.
Admin Interface Customization
The Django admin interface offers various customization options and even allows to create separate admin interfaces that enable user separation using permissions. Most of the customizations can be done using the ModelAdmin class that acts as the representation of a model in the administration interface. You can even change the look and feel of the interface by using the Django template engine.
Through the following section, you will learn how to change the functionality of the Admin Interface using the ModelAdmin class.
Changing the List View
In Django, if the (__str__) method is implemented by default, it will be taken as the raw name. This string representation method is the default method for drop-downs and multi-selections. The following examples illustrate different ways of changing the admin interface.
Using the list_display attribute, you can define which fields should be displayed. This attribute should be defined as a tuple even if there is a single element.
from django.contrib import admin
from salesinfo.models import Owner, VehicleSale, VehicleType

@admin.register(Owner)
class OwnerAdmin(admin.ModelAdmin):
    list_display = ("owner_id", "first_name", "last_name")
The above code block will change the Owner list to display all the defined fields.

You can change the order of the Owners list by defining the ordering attribute in the Meta subclass of the Owner Model class or simply within the admin module.
salesinfo/model.py
class Owner(models.Model):
    owner_id = models.CharField(primary_key=True, max_length=30)
    first_name = models.TextField(max_length=50, null=False)
    last_name = models.TextField(max_length=50, null=False)
    invoice = models.ManyToManyField("VehicleSale", blank=True)

    class Meta:
        verbose_name_plural = "Owners"
        db_table = "Owner"
        ordering = ("first_name", "last_name")
salesinfo/admin.py
@admin.register(Owner)
class OwnerAdmin(admin.ModelAdmin):
    list_display = ("owner_id", "first_name", "last_name", "get_no_sales")
    ordering = ("first_name", "last_name")
The above code will arrange the order of the Owners list first by firstname and then by the lastname as shown in the below result. In the table, the order in which the items have been arranged is indicated at the top right corner of the ordered column.

Now, let's modify the above code further by adding a custom field to indicate the number of sales for each owner. You can create a custom function called getnosales to retrieve the count of records associated with the specific owner object
@admin.register(Owner)
class OwnerAdmin(admin.ModelAdmin):
    list_display = ("owner_id", "first_name", "last_name", "get_no_sales")

    def get_no_sales(self, obj):
        no_of_sales = VehicleSale.objects.filter(owner=obj).count()
        return no_of_sales
    get_no_sales.short_description = "No of Sales"
RESULT

Combining Data from Other Models using a Foreign Key
In case if there is a Foreign Key, you can call upon that field (Foreign Key) as an object to get other fields of that model. In the below code block, the Foreign Key field is called and it will return the string representation of the object. Then, the price field can be called by using that Foreign Key field as an object.
To achieve this, you have to create a new function called getprice and return the price field as pricetotal and assign the function to the listdisplay attribute. Additionally, you can define the shortdescription attribute to the function so that it will display it as the header of the column.
@admin.register(VehicleSale)
class VehicleSales(admin.ModelAdmin):
    list_display = ('invoice_id', 'date', 'vehicletype', 'get_price')

    def get_price(self, obj):
        price_total = obj.vehicletype.price
        return price_total
    get_price.short_description = "Total Price"
RESULT

Linking Objects
Through the Django Admin interface, you can create links to other objects using a Foreign Key relationship. That can be done by using the reverse() and urlencode() methods. The following code block shows how to link the corresponding sales invoice with the vehicle type.
from django.contrib import admin
from django.urls import reverse
from django.utils.http import urlencode
from django.utils.html import format_html
from salesinfo.models import Owner, VehicleSale, VehicleType

@admin.register(VehicleSale)
class VehicleSales(admin.ModelAdmin):
    list_display = ("invoice_id", "date", "get_vehicle_details", "get_price")

    def get_price(self, obj):
        price_total = obj.vehicletype.price
        return price_total
    get_price.short_description = "Total Price"

    def get_vehicle_details(self, obj):
        link = (
            reverse("admin:salesinfo_vehicletype_changelist")  + "?" + urlencode({"id": obj.vehicletype.id})
        )
        return format_html('<b><a href="{}">{}</a></b>', link, obj.vehicletype)
    get_vehicle_details.short_description = "Vehicle Type"

@admin.register(VehicleType)
class VehicleType(admin.ModelAdmin):
    list_display = ("make", "model", "year", "color", 'price')
In the above example, there is a new method called “getvehicledetails” and it is using the reverse() function to point to the relevant admin page. You can define the reverse function URL as below.
admin: <app>_<model>_<URL name>The model name must be in lowercase. You can refer the official Django documentation for more information about django.urls module. Then, adding a query string to the end of the URL will point to the relevant object using the object id (obj.vehicletype.id). This will create a URL that is equivalent to: admin:
In addition to the above changes, you can expose all the fields in the Vehicle Type model to be displayed in the admin interface using the list_display attribute.
Linked Vehicle Sales

Linked Object

Adding Filters
Django's built-in filter widget allows you to filter data according to the specified field. This is done using the list_filter attribute and it should also be defined as a tuple. Let us add a filter to the VehicleTypes object to filter results by year.
@admin.register(VehicleType)
class VehicleType(admin.ModelAdmin):
    list_display = ("make", "model", "year", "color", 'price')
    list_filter = ("year",)
RESULT

Adding a Search Field
Django supports adding search fields in the Admin interface using the search_fields attribute. When defining a search field, it should be defined as a tuple or a list and can be extended using modifiers. Let's add a search field to search vehicles by make.
@admin.register(VehicleType)
class VehicleType(admin.ModelAdmin):
    list_display = ("make", "model", "year", "color", 'price')
    list_filter = ("year",)
    search_fields = ["make"]
The following screenshot shows how to search for any make that contains the letters ‘au’ anywhere in the make field value of each item. This is equivalent to %au% search in SQL.

You can also define multiple fields in the search_field attribute and it will result in searches that contain results from all the defined fields.
@admin.register(VehicleType)
class VehicleType(admin.ModelAdmin):
    list_display = ("make", "model", "year", "color", 'price')
    list_filter = ("year",)
    search_fields = ["make", "model"]
The following search will look for “5” in both make and model fields. This is equal to an OR condition as it will perform the search as make = %5% OR model = %5%.

Modifying the Add and Edit Interfaces
The fields in forms can be modified using the fields attribute or the fieldsets attribute. The fields attribute lets users rearrange, group, or hide fields within the form. In order to demonstrate this functionality, let's change the order of the fields and hide the description field from the add Vehicle Type form. The field will be defined according to the order given in the fields list.
@admin.register(VehicleType)
class VehicleType(admin.ModelAdmin):
    list_display = ("make", "model", "year", "color", "price")
    list_filter = ("year",)
    search_fields = ["make", "model"]

    fields = ["make", "model", "color", "price", "year"]
Before Modifications

After Modifications

The Fieldset attribute can be considered as an advanced version of the fields attribute. It enables users to create sections within forms. In the following example, the description field is moved into a new section.
@admin.register(VehicleType)
class VehicleType(admin.ModelAdmin):
    list_display = ("make", "model", "year", "color", "price")
    list_filter = ("year",)
    search_fields = ["make", "model"]
    ordering = ("make", "model")
    fieldsets = (
        (
            "Required Information", {
                # Section Description
                "description" : "Enter the vehicle information",
                # Group Make and Model
                "fields": (("make", "model"), "color", "price", "year")
            }
        ),
        (
            "Additional Information", {
                # Section Description
                "description" : "Enter any additional information",
                #Enable a Collapsible Section
                "classes": ("collapse",),
                "fields": ("description",)
            }
        )
    )
Modified Interface

Final Thoughts
Django offers a whole set of customization options even though we have only scratched the surface of it within this article. Here, we mainly discussed how to customize Django administration interface using the ModelAdmin class. On top of that, you will also gain a proper knowledge on how to modify the way data is presented, add search, filtering, and ordering options, changing form fields and the way they are represented by referring to this article.