
How to Use Django Migrations
Django migrations allow you to change the schema of the database that powers a Django web app.
However, they are often misunderstood - especially by developers who are new to the Django web framework.
This tutorial will teach you everything you need to know about how to use Django migrations.
Table of Contents
You can skip to a specific section of this Django migrations tutorial using the table of contents below:
What are Django Migrations?
In Django, whenever a model is created, updated, or deleted, a new migration will be used to propagate the changes to the given database schema.
Django framework has built-in support to interact with relational databases such as MySQL, PostgreSQL, or SQLite. Django allows us to interact with these databases without needing to write SQL queries. This is done using the object-relational mapper or ORM. The object-relational mapper provides the functionality to write Django models, where each defined database field will get mapped to the corresponding field in the database without the need for using SQL queries.
When a model is defined, migrations come into play to commit these changes to the database.
Migrations Commands
Django comes with several migration commands to interact with the database schema.
- migrate - used for applying and removing migrations.
- makemigrations - create new migrations based on changes made to models.
- sqlmigrate - displays SQL statements for a given migration.
- showmigrations - lists projects migrations and their status.
Migrations can be considered as a version control system for the database of the application. While makemigrations command packages the change made to models into individual migrations files and the migrate command is used to apply the packaged migrations into the database.
Django makes migrations for any changes done to the applications models or fields even if the change does not affect the database. The reason for that is having all the historical data relating to the specific model or fields allows accurate reconstructing of data. The migration files of each application reside in a “migrations” directory. Migrations are designed to be committed to and distributed as a part of the codebase. Using migrations allows the users to produce a consistent dataset from development to production environments.
How to Use Migrations
In this section, we will look at how to use migrations in a Django web application. First, let us create a simple project called “vehiclesales” where two applications capture the current prices and historical prices of the vehicles called “vehiclesales” and “vehicalsaleshistory” respectively.
All the examples provided below are done using PowerShell in a Windows environment. However, all Django based commands are interoperable irrespective of the operating system used.
Creating and Configuring the Project and Applications
django-admin startproject "vehicle_sales"
python manage.py startapp vehicle_sales_history
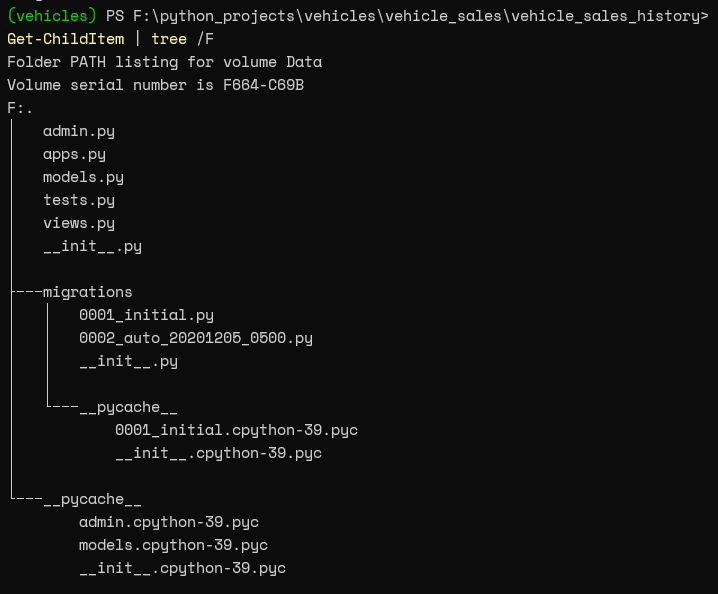
Let us look at the folder structure of the project before any migration files are made. The tree command is used to obtain a formatted output in PowerShell.
Get-ChildItem | tree /FLinux users can use the following command
ls | treeRESULT

Populating the Model
The “vehiclesaleshistory” application model must be created before we can use migrations. we will create the following model and add the application to the INSTALLED_APPS in the main settings.py file.
.\vehicle_sales_history\models.pyfrom django.db import models
class SalesPriceHistory(models.Model):
date = models.DateTimeField(auto_now_add=True)
make = models.CharField(max_length=60)
model = models.CharField(max_length=60)
price = models.DecimalField(null=False , decimal_places=2, max_digits=10).\vehicle_sales\settings.pyINSTALLED_APPS = [
'django.contrib.admin',
'django.contrib.auth',
'django.contrib.contenttypes',
'django.contrib.sessions',
'django.contrib.messages',
'django.contrib.staticfiles',
'vehicle_sales_history',
]Before making migrations, let us check the Model for Errors using the “check” command. The check command checks all the files within the Django project for common errors and we can specify which category to check by using the -tag attribute.
Check the complete Django project
python manage.py checkOnly check the models within the Django project
python manage.py check --tag modelsRESULT

Initial Migration
Using makemigrations command
Let us look at how to make the first migration so the changes that were done to the model file will be reflected in the database. In this instance, the database will be a simple SQLite database created by default by Django.
python manage.py makemigrations vehicle_sales_historyRESULT

Now, let us look at the folder structure of the project to identify the newly created migrations file

We can identify that a new migration file called “0001_initial.py” has been created inside the migrations folder. This is the file that will be used to create the initial table structure in the database. The “db.sqlite3” is the default simple database created by Django. When a user tries to access a non-existent SQLite database file, Django will automatically create an SQLite database. This behavior is unique to SQLite before using any other backend database like PostgreSQL or MySQL a new database must be created manually.
0001_initial.py
You would have noticed in the migration file there is an additional field called “id” that has been defined. It's created as the primary key field in the migration file automatically becuase we have not defined a primary key in the model.py file. A primary key field can be simply defined by adding the parameter (primary_key=True) to the desired field.
from django.db import migrations, models


class Migration(migrations.Migration):

    initial = True

    dependencies = [
    ]

    operations = [
        migrations.CreateModel(
            name='SalesPriceHistory',
            fields=[
                ('id', models.AutoField(auto_created=True, primary_key=True, serialize=False, verbose_name='ID')),
                ('date', models.DateTimeField(auto_now_add=True)),
                ('make', models.CharField(max_length=60)),
                ('model', models.CharField(max_length=60)),
                ('price', models.DecimalField(decimal_places=2, max_digits=10)),
            ],
        ),
    ]
We have used the makemigrations command to create migrations however the changes will not be reflected in the database until we apply the migrations using the migrate command.
Using migrate command
Before applying the migrations, let us explore the SQLite database to check if there are any tables created. We will be using the Django dbshell management command to access the default SQLite database.
python manage.py dbshellRESULT

When we check for tables using the “.tables” command nothing returns as output so we can assume that there are no tables in the SQLite database.
The sqlmigrate command can be used to identify the SQL queries which will be written to the database without applying the changes. The sqlmigrate command requires two mandatory arguments, the name of the app and the migration name.
python manage.py sqlmigrate vehicle_sales_history 0001_initialRESULT

Let us now apply the migrations using the migrate command. When the migrate command is called, it will apply the migrations from both the user-defined migration files and system migrations.
python manage.py migrateRESULT

After a successful migration operation, we will look at the SQLite database to verify if the migrations are successfully applied.
python manage.py dbshell.tablesRESULT

From the above output, we can identify that both the user-defined and system tables are successfully created within the database. The user-created 'SalesPriceHistory' model is created as ‘vehiclesaleshistory_salespricehistory’. Let us look at the structure of the table to verify if the fields are correctly defined. The “--indent” parameter is used to obtain a formatted output.
.schema --indent vehicle_sales_history_salespricehistoryRESULT

Migrations will only get applied if there are changes found in the models. When there are no migrations to apply, the makemigrations or migration commands will not act.
makemigrations command

migrations command

Subsequent Migrations
Let us have a look at how modifying the models reflect in migrations. When a model changes, the database table must be changed according to the changes done to the model. However, if the model definitions are different from the current database schema, this will result in a django.db.utils.OperationalError.
In the vehiclesaleshistory model, we will be changing the “model” CharField to a TextField and add a new field called color with the default value “Unknown”.
.\vehicle_sales_history\models.pyfrom django.db import models
class SalesPriceHistory(models.Model):
date = models.DateTimeField(auto_now_add=True)
make = models.CharField(max_length=60)
model = models.TextField()
price = models.DecimalField(null=False , decimal_places=2, max_digits=10)
color = models.CharField(default='Unknown', max_length=50)When the “makemigration” command is called, the subsequent migration files will be created with the current time of the system attached to the file name. Using the --dry-run operator, we can identify what changes will be made to the new migration file before creating the migration file.
python manage.py makemigrations --dry-runRESULT

python manage.py makemigrationsRESULT

The makemigrations command will create a new file called 0002auto20201205_0500.py within the migrations directory.
Using the migrate command, we apply the changes to the SQLite database and validate the changes by exploring the database from the Django shell. The sqlmigrate command will print out the SQL commands that will be executed within the database. Note that the command can be executed without using the full name of the migration file. In this instance, the first four digits of the file name are used.
python manage.py sqlmigrate vehicle_sales_history 0002RESULT

python manage.py migrateRESULT

Verifying the database
python manage.py dbshell.schema --indent vehicle_sales_history_salespricehistoryRESULT

The above output demonstrates that the changes made to the model file are successfully reflected in the database. The “model” field has been converted to a text field while the new “color” field has been added to the database.
Listing Migrations
The showmigrations command is designed to provide a detailed overview of the migrations within all the apps associated with the given Django project. If migration is already applied, it will be indicated with an “X” in front of the migration.
python manage.py showmigrationsRESULT

We will modify the model.py file in the “vehiclesaleshistory” app to create a new table called “InventoryHistory” and create a migration file and see how it is reflected in the “showmigrations” command before the changes are applied to the database.
.\vehicle_sales_history\models.pyfrom django.db import models
class SalesPriceHistory(models.Model):
date = models.DateTimeField(auto_now_add=True)
make = models.CharField(max_length=60)
model = models.TextField()
price = models.DecimalField(null=False , decimal_places=2, max_digits=10)
color = models.CharField(default='Unknown', max_length=50)
class VehicleInventory(models.Model):
date = models.DateTimeField(auto_now_add=True)
make = models.CharField(max_length=60)
model = models.TextField()
price = models.DecimalField(null=False , decimal_places=2, max_digits=10)
color = models.CharField(default='Unknown', max_length=50)
available_inventory = models.IntegerField(default=0)We will make the new migration file and using the “showmigrations” command, we see how it is represented in the output.
python manage.py makemigrationsRESULT

python manage.py showmigrations
The output indicates that the migration has not been applied to the database as only the migrations applied to the database will be indicated with an “X”. Let us apply the migrations to the database and find out how it will be reflected in the “showmigrations” command.
python manage.py migrateRESULT

python manage.py showmigrations
Rolling Back Migrations
Django Migrations provides a convenient way of rolling back migrations to previous versions. Rolling back migrations can be done by calling the migration command with the name of the app and the name of the migration before the migration you want to roll back to.
Rollback syntax
python manage.py migrate <app name> <migration name>The following example demonstrates how we can roll back from the 0003vehicleinventory migration in the “vehiclesaleshistory” app to the 0002auto202012050500 migration.
Identify the current database structure
(Migration - 0003_vehicleinventory)
python manage.py dbshell.tables
.schema --indent vehicle_sales_history_salespricehistory
.schema --indent vehicle_sales_history_vehicleinventoryRESULTS


Roll Back the Migrations
(Roll Back Target - 0002auto20201205_0500)
python manage.py migrate vehicle_sales_history 0002_auto_20201205_0500RESULT

Verify the rollback of migrations
python manage.py dbshell.tables
.schema --indent vehicle_sales_history_salespricehistoryRESULT

From the above output, we can see that the “vehiclesaleshistoryvehicleinventory” table has been removed and the database has been rolled back to its previous state. The “showmigrations” command will reflect the change by indicating that the “0003vehicleinventory” migration has not been applied to the database.
python manage.py showmigrationsRESULT

There is an important thing to be remembered when rolling back migrations. Although most database operations can be reverted, if a field is removed from the model and the migrations are applied to the database, all the data within the column will be removed. Rolling back in this instance will not recover the data it will only create the removed field.
Naming Migrations
In the earlier example, we allowed Django to manage the naming conversion of the migration files. However, Django provides the option to create custom names using the “--name” operator.
In the following example, we will remove the 0003vehicleinventory file and recreate it with the custom name “createtable_vehicleinventory”.
Removing the file
rm .\vehicle_sales_history\migrations\0003_vehicleinventory.pyRESULT

Create a new migration file
python manage.py makemigrations vehicle_sales_history --name create_table_vehicleinventoryRESULT

Apply the migrations
python manage.py migrateRESULT

Check the Migration
python manage.py showmigrationsRESULT

Final Thoughts
In this article, we learned how to effectively use migrations in a Django project. Migration is a way to create and alter tables in a database offered by the Django framework. Using migrations with models, allows the developers to forgo the use of SQL to manipulate a database, unless for specific advanced use cases. This reduces the workload of the developers and allows easy debugging of applications. Additionally, allowing the rollback of migrations acts as a version control system for the database helping developers to roll back changes in case of an error or for testing purposes.