
Creating a Python GUI using Tkinter
Tkinter is the native Python GUI framework that comes bundled with the standard Python distribution.
There are numerous other Python GUI frameworks. However, Tkinter is the only one that comes bundled by default.
Tkinter has some advantages over other Python GUI frameworks. It is stable and offers cross-platform support. This enables developers to quickly develop python applications using Tkinter that will work on Windows, macOS, and Linux.
Another benefit is that the visual elements created by Tkinter are rendered using the operating system’s native elements. This ensures that the application is rendered as though it belongs to the platform where it is running.
Tkinter is not without its flaws. Python GUIs built using Tkinter appear outdated in comparison to other more modern GUIs. If you’re looking to build attractive applications with a modern look, then Tkinter may not be the best option for you.
On the other hand, Tkinter is lightweight and simple to use. It requires no installation and is less of a headache to run as compared to other GUI frameworks. These properties make Tkinter a solid option for when a robust, cross-platform supporting application is required without worrying about modern aesthetics.
Because of its low aesthetic appeal and easy of use, Tkinter is often used as a learning tool. In this tutorial, you will learn how to build a Python GUI using the Tkinter library.
Table of Contents
You can skip to a specific section of this Python GUI tutorial using the table of contents below:
- Python GUI - A Basic Tkinter Window
- Python GUI - Tkinter Widgets
- Python GUI - Label in Tkinter
- Python GUI - Entry in Tkinter
- Python GUI - Text in Tkinter
- Python GUI - Create Buttons in Tkinter
- Python GUI - Working With Events
- Final Thoughts
By the end of this tutorial, you will have mastered Tkinter and will be able to efficiently use and position its widgets. You can test your skills by trying to build your own calculator using Tkinter.
Let’s get down to it and start with creating an empty window.
Python GUI - A Basic Tkinter Window
Every Tkinter application starts with a window. More broadly, every graphical user interface starts with a blank window.
Windows are containers that contain all of the GUI widgets. These widgets are also known as GUI elements and include buttons, text boxes, and labels.
Creating a window is simple. Just create a Python file and copy the following code in it. The code is explained ahead and creates an empty Tkinter window.
import tkinter as tk

window = tk.Tk()

window.mainloop()
The first line of the code imports the tkinter module that comes integrated with the default version of Python installation. It is convention to import Tkinter under the alias tk.
In the second line, we create an instance of tkinter and assigning it to the variable window.
If you don’t include the window.mainloop() at the end of the Python script then nothing will appear. The mainloop() method starts the Tkinter event loop, which tells the application to listen for events like button clicks, key presses and closing of windows.
Run the code and you’ll get an output that looks like this:
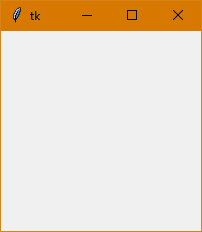
Tkinters windows are styled differently on different operating systems. The above given output is generated when the Tkinter window is generated on Windows 10.
It is important to note that you should not name the python file tkinter.py as this will clash with the Tkinter module that you are trying to import. You can read more about this issue here.
Python GUI - Tkinter Widgets
Creating an empty window is not very usefu. You need widgets to add some purpose to the window. Some of the main widgets supported by Tkiner are:
- Entry: An input type that accepts a single line of text
- Text: An input type that accepts multiple line of text
- Button: A button input that has a label and a click event
- Label: Used to display text in the window
In the upcoming section, the functionality of each widget will be highlighted one by one. Note that these are just some of the main widgets of Tkinter. There are many more widgets that you can check out here, and some more advanced widgets here.
Moving on, let’s see how a label works in Tkinter.
Python GUI - Label in Tkinter
Label is one of the important widgets of Tkinter. It is used for displaying static text on your Tkinter application.
The label text is uneditable and is present for display purposes only.
Adding a label is pretty simple. You can see an example of how to create a Tkinter label below:
import tkinter as tk


window = tk.Tk()

lbl_label = tk.Label(text="Hello World!")
lbl_label.pack()

window.mainloop()
Running this code will provide the following output:
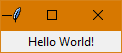
For reasons that I'll explain in a moment, this output is far from idea. Let's explain this code first.
The variable lbl_label initializes a Tkinter label variable and is attached to the window by calling the pack() method.
You can also change the background and text color. The height and the width of the label can be adjusted as well.
To change the colors and configure the height and width, simply update the code as follows:
lbl_label = tk.Label(
text="Hello World!",
background="green",
foreground="red",
width="10",
height="10"
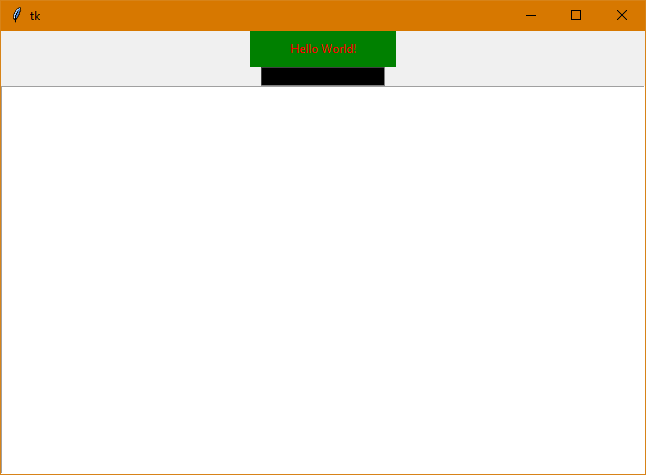
)Running the code will yield the following output:
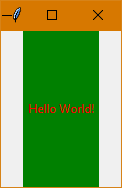
Fig 3: Configuring Tkinter Label Widget
You may notice that the label box is not square despite the fact that the width and height have been set equal. This is because the length is measured by text units.
The horizontal length is measured by the width of 0 (number zero) in the default system font and similarly, the vertical text unit length is determined by the height of the character 0.
Next, let's explore how to accept user input in a Tkinter application.
Python GUI - Entry Widgets in Tkinter
The entry widget allows you to accept user input from your Tkinter application.
The user input can be a name, an email address or any other information you'd like.
You can create and configure an entry widget just like a label widget, as shown in the following code:
import tkinter as tk


window = tk.Tk()

lbl_label = tk.Label(
    text="Hello World!",
    background="green",
    foreground="red",
    width="20",
    height="2"
)

ent_entry = tk.Entry(
    bg="black",
    fg="white",
    width="20",
)

lbl_label.pack()
ent_entry.pack()

window.mainloop()
Running the code will yield the following output:
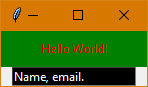
You can read the input inserted by the user by using the get() method. A practical example of this method will be shown in the button section later in this Python GUI tutorial.
Python GUI - Text in Tkinter
The Tkinter entry widget is useful if you’re looking for a single line of input. If a response requires multiple lines then you can use the text widget of Tkinter. It supports multiple lines, where each line is separated by a newline character ‘\n’.
You can create a text widget by adding the following code block in the code shown in the entry widget section:
txt_text = tk.Text()
txt_text.pack()
Running the code after adding the code above will yield the following output:
Python GUI - Create Buttons in Tkinter
If you want your Tkinter application to serve any meaningful purpose, you will need to add buttons that perform some operation when they are clicked.
Adding a button is pretty straightforward and similar to how we added the other widgets. You can add a simple button by adding the following code block:
btn_main = tk.Button(
    master=window,
    text="Main Button"
)
btn_main.pack()
Running the code will yield the following output:
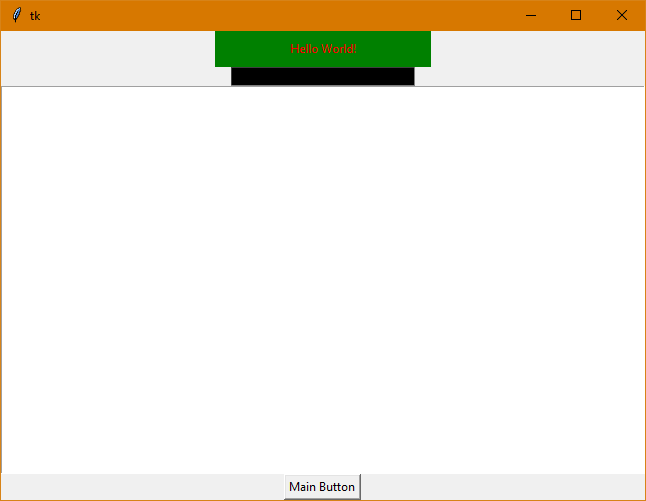
Now that there’s a button, we can do some serious damage! The button generates an event that can be used for changing elements or performing other functionality.
Python GUI - Working With Events
For the purpose of this tutorial, functions will be kept simple. So, whenever the Main Button is clicked, whatever the user inputs in the entry widget will be pasted in the text and label widgets.
The code is edited as follows to get achieve this functionality:
import tkinter as tk
def copyText(text):
if(str(text)):
textVar.set(text)
txt_text.insert(tk.END, text)
window = tk.Tk()
textVar = tk.StringVar()
textVar.set("Hello World!")
lbl_label = tk.Label(
textvariable=textVar,
background="green",
foreground="red",
width="30",
height="2"
)
ent_entry = tk.Entry(
bg="black",
fg="white",
width="30",
)
txt_text = tk.Text()
btn_main = tk.Button(
master=window,
text="Main Button",
command = lambda: copyText(ent_entry.get())
)
lbl_label.pack()
ent_entry.pack()
txt_text.pack()
btn_main.pack()
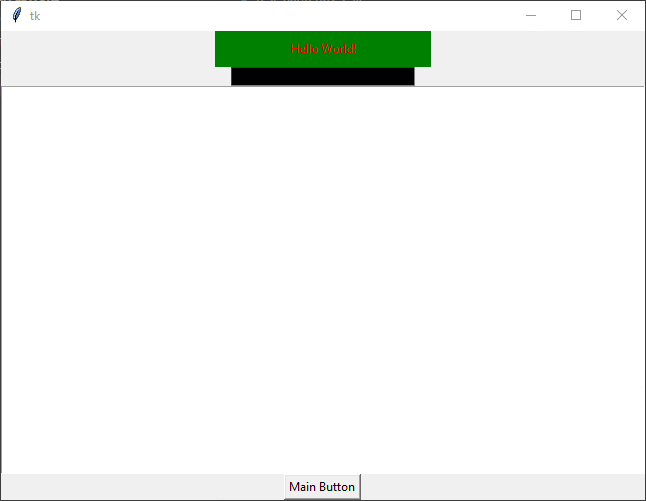
window.mainloop()In this code, the copyText() method has been introduced.
This method copies the text of the entry widget to the label and the text widgets. To change the text of the label, we introduced a stringVar and instead of setting the text of label, we set the textVariable equal to stringVar.
Using the command statement, we set the button to call the copyText method whenever it is clicked. The entry widget’s text is passed to the method.
In the copyText method, the first step is to check whether the entry widget is an empty string. Python makes it simple to do this as an empty string is considered a boolean false value in Python. After checking for the empty string, the value of the entry widget is copied to the stringVar and the text widget.
The text has been inserted at the end of the text widget by setting its position as tk.END. It can be set to a particular index as well by replacing it with “1.0”, where ‘1’ is the line number and ‘0’ is the character.
Executing the code will yield the following output:
Final Thoughts
Working with Python is fun and simple. It allows you to build cool applications pretty easily.
Learning Tkinter allows you to build your first Python GUI. It’s simple, supports cross-platform compatibility and you can build many different applications with it.
This tutorial is just a basic guide to Tkinter. There is much more available for you to learn about Tkinter. Learning about geometry managers should be your next step to improve your Tkinter skills.
After working through this tutorial, you should have a basic understanding of Tkinter and how to use buttons to call functions, paving way for further exploration.